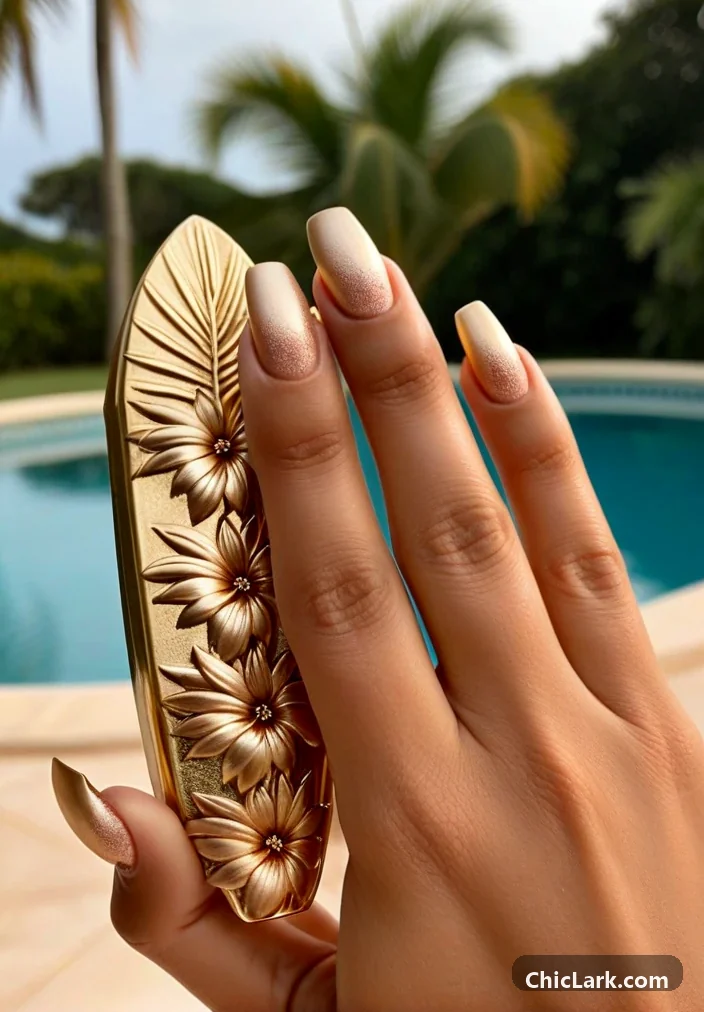
As the summer sun graces us with its warmth, an ombre floral manicure emerges as the quintessential style statement for any outdoor occasion. This dreamy design combines the soft elegance of an ombre effect with delicate floral motifs, offering a unique artistry that enhances the femininity of your look while remaining effortlessly chic. Perfect for summer outings, beach vacations, or garden parties, this nail art captures the essence of the season’s vibrant spirit.
Why This Look Works
The featured ombre floral nails are a symphony of soft hues, blending seamlessly from a nude base to a gently transitioning pink tip. This color palette not only evokes a sense of sophistication but also embraces a playful summer vibe. The glossy finish adds a layer of lustrous depth, allowing the floral accents to truly pop.

Each nail showcases a delicate floral design, adding an intricate touch that enhances the overall aesthetic without overwhelming it. The combination of this refined ombre fade with light floral elements strikes a perfect balance between modern elegance and romantic femininity.
Key Elements of Ombre Floral Nails
- Color Gradient: The ombre effect should transition smoothly between colors, maintaining a harmonious blend—ideal for a chic summer nail look.
- Floral Accents: Small, intricate flowers can be added using nail art brushes, stickers, or stamping kits for easy customization.
- Glossy Finish: A top coat is essential for locking in the design and adding extra shine, emphasizing the colors and details of the floral art.
- Nail Shape: Consider a soft oval or almond shape, which pairs well with the feminine aspect of this style.
How to Recreate the Look
- Prep Your Nails: Start by trimming and filing your nails into the desired shape. Gentle buffing will provide a smooth canvas.
- Base Coat: Apply a clear base coat to protect your nails and help the polish adhere better.
- Create the Ombre Fade: Use a makeup sponge to dab on your nude base color, followed by the pink tip. Blend them together for a soft transition.
- Add Floral Designs: Once the ombre is dry, use a fine nail brush or stamping tool to create or apply the floral accents.
- Finish with Top Coat: Seal your design with a glossy top coat. This step not only enhances the shine but also ensures the longevity of the manicure.
Variations to Consider
While this look is stunning as it stands, there are numerous stylish variations to explore.
- Color Combos: Experiment with other soft pastels like lavender, mint, or peach for a refreshing twist on the classic ombre.
- Floral Styles: Incorporate larger floral designs, or consider watercolor techniques for a more abstract look.
- Finish Options: For a matte finish, apply a matte top coat after your glossy one settles, creating a sophisticated contrast between matte and glossy sections.
- Seasonal Themes: Adapt the floral components with seasonal blooms—think sunflowers for autumn or snowflakes for winter-inspired designs.
Ombre floral nails truly embody the charm of summer. They invite you to celebrate warmth, femininity, and elegance with every gesture. Whether you’re dressing up for a picnic or heading out for a seaside dinner, this style resonates with the essence of the season. With just a few creative techniques, you can craft a stunning manicure that speaks elegance and individuality. So, why not give your nails a seasonal refresh that evokes a soft breeze and blooming gardens everywhere you go?